 Save
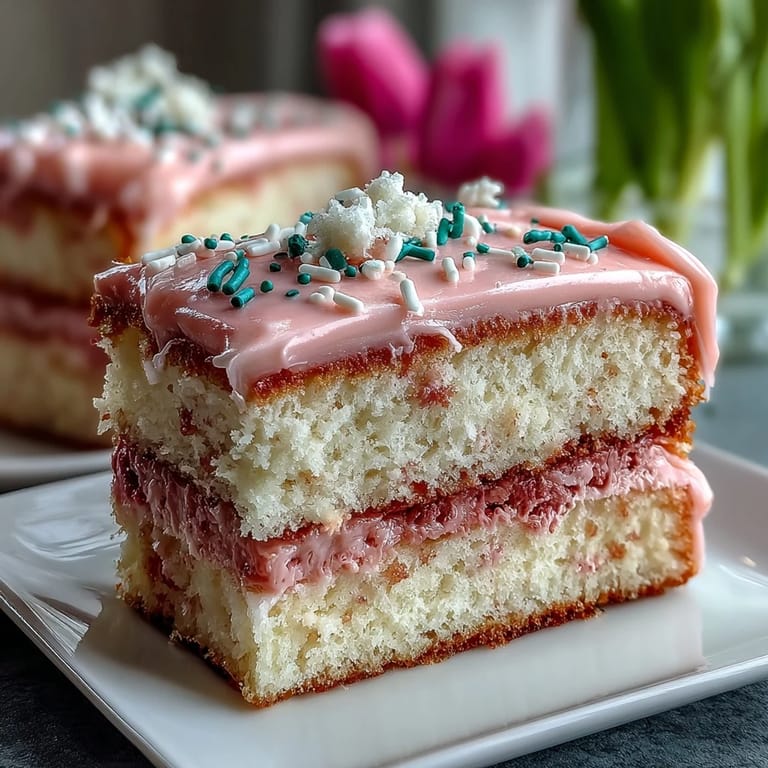
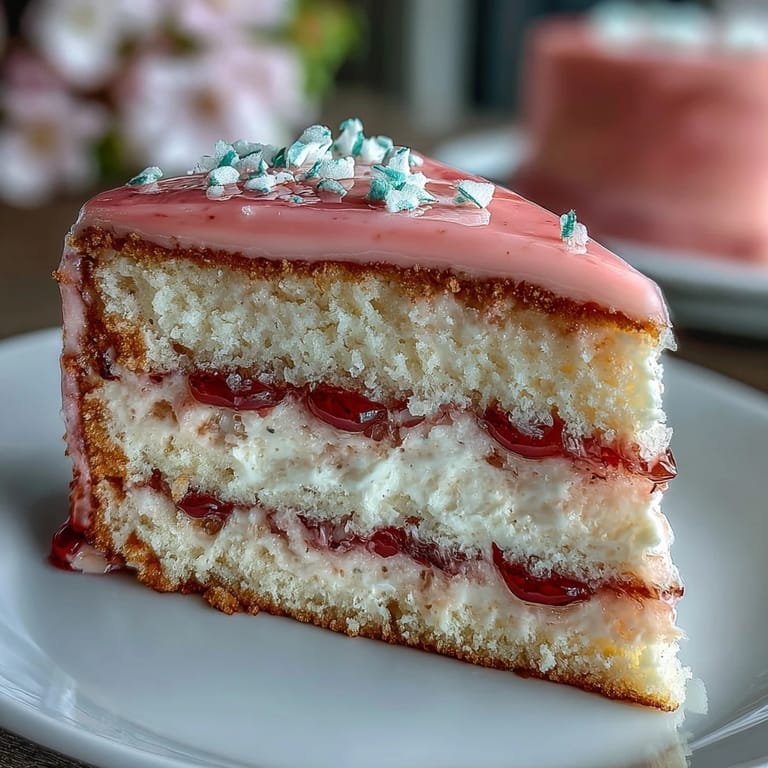
Save I was standing in my kitchen on a gray March afternoon when my sister texted a photo of a wedding cake she'd seen online—all soft pinks melting into buttery yellows like a sunset. She asked if I could make something like that for her spring engagement party, and honestly, I felt that flutter of both excitement and slight panic. But something about those gentle gradient colors spoke to me, so I decided to figure it out. This ombre cake became my answer, and it turned out to be far simpler and more forgiving than I'd imagined.
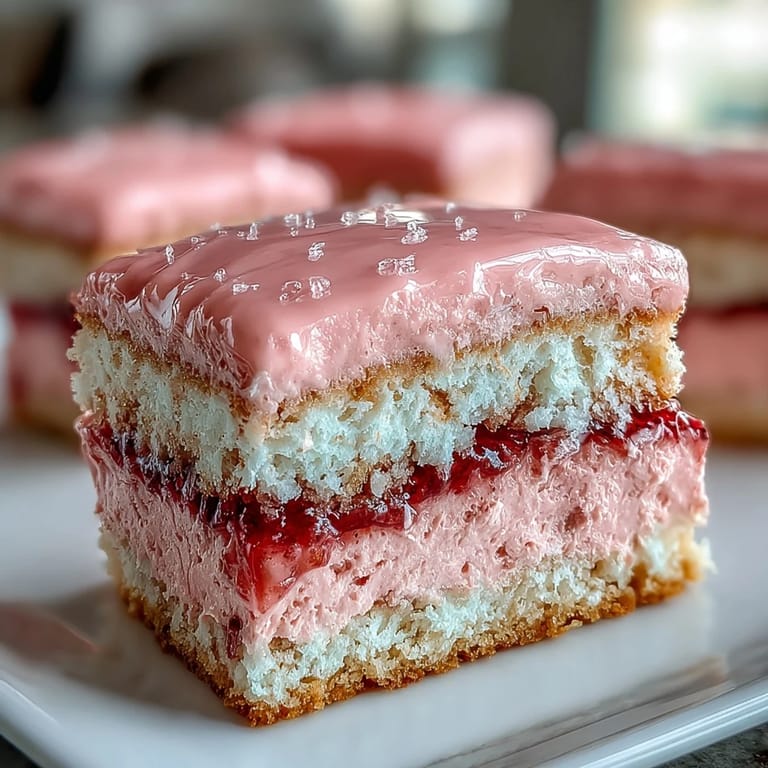
My sister's face when she saw the finished cake sitting on her kitchen counter was worth every careful brush stroke of blended frosting. She circled it slowly, examining the gradient from every angle, then laughed and said it seemed almost too pretty to cut into. But we did cut into it, right there in her kitchen with champagne and strawberries, and that's when I realized the magic wasn't just in how it looked—it was in how it brought everyone together.
Ingredients
- All-purpose flour (3 cups): The foundation that gives you that tender, almost delicate crumb; sifting it isn't absolutely necessary, but whisking it with the baking powder and salt matters because it distributes the leavening evenly.
- Baking powder (2½ tsp): Your invisible helper that makes the cake rise into those airy layers that hold the frosting so beautifully.
- Salt (½ tsp): This tiny amount actually brightens the sweetness and deepens the vanilla flavor in ways people can't quite identify.
- Unsalted butter (1 cup, room temperature): Room temperature is non-negotiable here; it incorporates air into the sugar mixture and creates that fluffy texture that makes the cake taste like a cloud.
- Granulated sugar (2 cups): Beating it with butter for those few minutes is when the magic starts; you're actually aerating the mixture, which affects how the cake rises.
- Eggs (4 large, room temperature): Cold eggs won't incorporate smoothly and can make your batter lumpy; room temperature eggs blend seamlessly into the butter mixture.
- Pure vanilla extract (1 tbsp): The flavor anchor that ties everything together without shouting about itself.
- Whole milk (1 cup, room temperature): The temperature matters because adding cold liquid to your creamed butter and eggs can cause the batter to break or separate.
- Gel food coloring (pink and yellow): Gel coloring gives you those true pastel shades without adding extra liquid like liquid dyes would; it's the secret to colors that don't look washed out or too neon.
- Unsalted butter for frosting (1½ cups, room temperature): The foundation of a frosting that's silky and pipeable, never grainy or separated.
- Powdered sugar, sifted (5 cups): Sifting removes the little clumps that can make frosting feel gritty no matter how long you beat it.
- Milk or heavy cream (3–4 tbsp): Start with less and add more gradually; too much liquid means you'll be chasing the right consistency.
Tired of Takeout? 🥡
Get 10 meals you can make faster than delivery arrives. Seriously.
One email. No spam. Unsubscribe anytime.
Instructions
- Prep your workspace:
- Line three 8-inch cake pans with parchment paper and get your oven preheating to 350°F. Having everything ready before you start mixing is the difference between a relaxed baking session and a frantic one.
- Mix the dry ingredients:
- Whisk together your flour, baking powder, and salt in a medium bowl until they're evenly distributed. This aerates the flour slightly and ensures your leavening is spread throughout the batter.
- Cream butter and sugar:
- Beat room-temperature butter with sugar on medium speed for about 3 to 4 minutes until it's pale and fluffy; you should be able to see a noticeable lightness and the mixture should look almost like frosting. Listen for the mixer to sound slightly quieter as air gets incorporated.
- Add eggs gradually:
- Add eggs one at a time, beating well after each addition so they fully incorporate before you add the next. This prevents the batter from looking curdled or separated.
- Mix in vanilla:
- Add vanilla extract and beat until just combined. The whole mixture should smell sweet and slightly floral at this point.
- Alternate wet and dry ingredients:
- Add about a third of the flour mixture, mix until just combined, then add half the milk, then another third of flour, then the remaining milk, then the final flour portion. Always start and end with flour—this protects the structure of your batter.
- Divide and tint the batter:
- Pour the batter evenly into three bowls and add a small drop of pink gel coloring to one (you're aiming for pale pastel, not bubblegum), yellow gel to the second, and leave the third plain or add a touch of both for a soft peach. Use a toothpick or the tip of a fork to swirl the color in gently until you get an even shade.
- Bake the layers:
- Pour each colored batter into its prepared pan and smooth the tops. Bake for 22 to 26 minutes, checking at the lower end of the time range because ovens vary; insert a toothpick into the center and it should come out clean or with just a few moist crumbs, not wet batter.
- Cool completely:
- Let cakes rest in their pans for 10 minutes (this prevents them from falling apart), then turn them out onto wire racks to cool all the way down. Warm cake is soft and fragile; patience here saves heartbreak.
- Make the frosting:
- Beat room-temperature butter on medium-high speed until it's creamy and pale, then gradually add sifted powdered sugar a cup at a time, beating between additions. Add vanilla, salt, and milk, and continue beating until the frosting is light and fluffy; if it seems too stiff, add milk by the teaspoon until you reach the perfect consistency.
- Tint the frosting:
- Divide the frosting into three bowls and color them to match your cakes—pale pink, pale yellow, and plain. Mix gently with a spatula to avoid deflating all that airiness you just created.
- Assemble the layers:
- Place your yellow cake layer on the serving plate, spread a thin, even layer of yellow frosting on top. Add your neutral (or peach) layer and frost with plain frosting, then top with the pink layer.
- Create the ombre effect:
- This is where the magic happens—use your remaining frosting to coat the sides of the cake, blending from yellow at the bottom to pink at the top. Use an offset spatula or cake scraper to smooth and blend as you work your way around; think of it like painting, where the colors should meet without harsh lines.
- Decorate and rest:
- Add pastel sprinkles, edible flowers, or whatever final touch speaks to you. Refrigerate for at least 30 minutes before slicing so the layers hold their shape and you get clean, beautiful cuts.
 Save
Save There's a particular kind of joy in watching someone's eyes widen when they see a cake you made, especially when it's this beautiful. My sister kept the empty cake box on her counter for a week, showing it to everyone who visited, and I caught myself feeling oddly proud each time someone asked where it came from.
The Science of Soft Colors
Gel food coloring is your friend here because it doesn't add liquid to your batter the way liquid dyes do. I learned this the hard way when I once tried using regular liquid coloring and ended up with a cake that was slightly too moist in spots, with colors that looked murky instead of clear. Gel coloring has a much higher concentration of pigment, so you use less and your colors stay vibrant and true. A tiny toothpick-dab of gel will tint an entire bowl of batter in the most gorgeous way, and that's when you realize pastels aren't about using less color—they're about using the right formula.
Timing and Temperature Matter
I've made this cake in kitchens that run cold and kitchens where the sun streams in all afternoon, and the baking time varies slightly each time. That's why checking at 22 minutes instead of waiting the full 26 can save you from a slightly dry cake. Your oven has its own personality, and after the first time you make this, you'll know whether yours runs hot or cool. The toothpick test is your best friend—insert it into the center of the thickest layer and it should emerge clean or with just a few moist crumbs clinging to it.
Frosting and Flavor Variations
Some people ask if they can substitute buttermilk for the regular milk, and yes, absolutely—it creates a slightly tangier cake with a more tender crumb that some people actually prefer. I've also experimented with adding a tiny pinch of almond extract along with the vanilla, which adds a subtle floral note that pairs beautifully with the pastels. If you want the frosting to be less sweet, you can reduce the powdered sugar slightly and add a touch more vanilla extract instead; you're in control of how rich and sugary this ends up tasting.
- Substitute buttermilk for a gentler tang and slightly softer texture.
- Try adding a whisper of almond or rose extract for unexpected depth.
- Adjust sweetness by tweaking the powdered sugar-to-vanilla ratio rather than adding more liquid.
 Save
Save This cake has quietly become my answer to celebrations—the one I reach for when I want to give someone something that tastes as lovely as it looks. Every time I make it, I learn something new about blending colors or about how butter behaves, and that's the real gift.
Recipe FAQs
- → How do I achieve the pastel ombre effect?
Divide the batter into three portions, tint each with pink, yellow, or leave one plain. Layer and frost with matching buttercream colors for a smooth gradient.
- → What type of food coloring works best?
Gel food coloring is ideal as it provides vibrant colors without altering the batter consistency.
- → Can I prepare this in advance?
Yes, bake and cool the layers beforehand. Assemble and decorate on the day of serving for best freshness.
- → How should I store the finished cake?
Store covered at room temperature for up to one day or refrigerate for up to four days to maintain freshness.
- → Are there any common allergens present?
This cake contains wheat, eggs, and dairy. Check food coloring labels for potential additional allergens.